Monday, October 22, 2012
Saturday, October 20, 2012
Dutch Chocolaat Side Table
Hello everyone I hope you had a wonderful week.
It has been a little crazy around here as my daughter had her third child, a boy named Bowen, prematurely. Mother and son are fine and are suppose to be able to come home tomorrow. Isn't he just precious?!
Before all this happened I did finish a few pieces of furniture including this ca.1968 side table. I thought I had taken a before picture but was unable to find it. Sorry. It is a solid wood table and was stained with a medium, dark, orange stain.
I started out by painting the whole table with "Soldier Blue" milk paint.
I did not use the bonding agent as I wanted the table to have a distressed look. If you don't add the bonding agent to milk paint it will not adhere like regular paint in spots, and as a result you can just scrape the loose spots away and voila, your piece is distressed.
If you look at the top you can see the areas that had loose paint.
I changed my mind about what I wanted to do and painted the top only with "Old White" chalk paint. Changing her mind is still a woman's prerogative isn't it? :-)
Once that was dry I added an image from The Graphics Fairy using decoupage. I chose a Dutch chocolate ad and applied just the image with Mod Podge and free handed the words with Expresso paint and a fine, artist, paint brush.
I then applied an antique glaze tinted with Expresso paint to the entire table wiping it away with a dry cloth. After the glaze dried I took a sanding block and distressed the entire table again.
The streak across this picture is a rainbow reflection from my chandelier. I just couldn't get rid of it! lol
Once everything was completely dry I applied two coats of clear wax to seal it.
If you would like to see another post on using milk paint go here.
Just a little reminder. Don't forget to link up this week at Transformed Tuesday. Just click the button above.
Just a little reminder. Don't forget to link up this week at Transformed Tuesday. Just click the button above.
Until next time keep on creating and up-cycling!
I'm sharing with the following parties won't you join me?
Saturday
Saturday Night Special
Get Schooled Saturday
Show & Tell Saturday
Spotlight Saturday
Sunday
Sunday Showoff
Bouquet of Talent Party
Nifty Thrifty Sunday
Monday
Make It Pretty Monday
Tuesday
Stuff of Success
Wednesday
POWW @ Primitive & Proper
Monday, October 15, 2012
Totally Transformed Tuesday #10 & Features!
Welcome everyone to Totally Transformed Tuesday #10! I'm so glad you've come by and I appreciate each and everyone of you.
Sunday, October 14, 2012
Chantilly Gray China Cabinet
Hello everyone! I hope life has been treating you well since I last posted. :-)
Today I'm sharing how I refurbished an antique, mahogany china cabinet. As you know, if you follow me on FB, I am mixing my own colors of Annie Sloan Chalk Paint and I used two of those colors on this piece. Chantilly Gray and Seaside Whispers, which is a soft aqua color.
Here is the finished piece.
As you can see from the first picture I'm still doing most of my work on my carport but I have good news! I'm getting my own shop! Yeah! I'm buying a portable building and finishing it out on the inside so I can have air and heat. Yippeee! LOL I will be sharing the process of finishing the inside of the building with you as we go. I can't wait!
So, back to this cabinet. First, I painted it with Annie Sloan's Coco. Coco is a brownish gray that is great for undercoats. Once that was dry I applied my new color Chantilly Gray to the outside.
I brought it inside to my kitchen and finished it because it was just too hot outside. When applying the gray I more or less just dry brushed it on allowing the Coco to show through in places. This aged the piece quit a bit and left the darker color in the crevises giving me the look I wanted with much less work.
Next I painted the inside and the shelves with Seaside Whispers. I love that soft, aqua green with the gray.
I know. It looks gray but I promise it is pale blue-green. I just could not get a good picture of the inside.
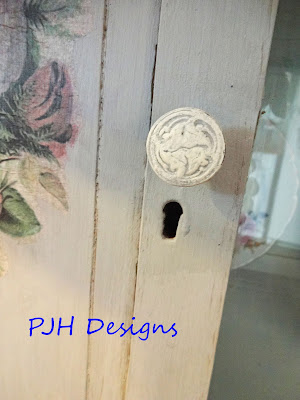
Once it was painted I just thought it was too plain. It just needed something. So I added tissue paper, floral pictures to each of those side panels.
The graphics came from...you guessed it "The Graphics Fairy." I just used double sided tape and taped some tissue paper to a regular sheet of printer paper and ran it through my ink jet printer. Only tape the outside edges and gently pull it apart after printing.
I then applied two coats of a clear, soft wax and I was finished.
See that wasn't hard. :-) I just love this piece and if I had somewhere to put it I'd keep it. (I really need an old two story plantation house with a couple of extra wings to hold all the furniture I want.) ;-) But I'm stuck in this small house on the lake. Just kidding I've grown to love this place.
I'll leave you with a couple of more pictures.
By the way, that is my best china I picked up about 20 years ago at a flea market. Love the pink roses.
The heart with paper roses and lace on top is a craft project from last summer.
Thanks for stopping by. Until next time
Monday
Make the Scene Monday
Wednesday
Power Of Paint Party
Wow Us Wednesday
Thursday
Share Your Cup Thursday
Friday
Feathered Nest Friday
Redoux Link Party
Shabbilicious Friday
Saturday
Get Schooled Saturday
Show & Tell Saturday
Spotlight Saturday
Tuesday, October 9, 2012
Totally Transformed Tuesday # 9 And Features
I'm so excited its Tuesday again and time to see what everyone has been up to this week! Here is one of the things I completed...an antique pie safe.
You can see the complete post with all the details of how I transformed this piece here.
Now I have the difficult job of sharing my favorites from last week.
First is Penny's shabby chic, spooky kitchen at Penny's Treasures. You really need to check out the full post to see her gorgeous kitchen!
Myric at Petites Passions shared her darling suitcase table. Be sure to stop by and check out her tutorial so you can make your own. :-)
I love these sea glass pendants from Gypsea Mermaid. So pretty and like me she has a true concern for preserving the environment.
Mixed Media Vintage shared how to make and sew waxed prints. I'd never heard of this have you? So pretty.
There were more blogs I wanted to feature but they had no back link. Please be sure to provide a back link so you may be featured.
Were you a star today? Be sure to grab your brag button!
Subscribe to:
Posts (Atom)


.JPG)


