Hello Remodelaholics' followers! How are y’all? Good I hope and ready to learn how to give your cabinets a distressed, vintage, furniture finish.
But first let me introduce myself. My name is Peggy Hale and my blog is PJH Designs. I love to do home remodeling projects and restore vintage and antique furniture. Here are some of my followers' favorite projects.
How to build your own butcher block style counter tops. Which I have also shared here on Remodelholic. You can see it here.
One of my latest furniture redos was a 1970's china hutch that I transformed into a vintage, jelly style cabinet. You may see that post here.
Now on to the post I'm sharing with you today. I'm not going to kid you about this project it is very time consuming and can be tedious. But so worth it when you're finished.
For this project you will need:
This is how my kitchen looked when I was finished.

But first let me introduce myself. My name is Peggy Hale and my blog is PJH Designs. I love to do home remodeling projects and restore vintage and antique furniture. Here are some of my followers' favorite projects.
How to build your own butcher block style counter tops. Which I have also shared here on Remodelholic. You can see it here.
One of my latest furniture redos was a 1970's china hutch that I transformed into a vintage, jelly style cabinet. You may see that post here.
Now on to the post I'm sharing with you today. I'm not going to kid you about this project it is very time consuming and can be tedious. But so worth it when you're finished.
For this project you will need:
- 1 quart of Annie Sloan Chalk Paint in Pure White and one quart in Paris Gray or colors of your choice. One lighter and one dark.
- A quart of your choice of glazing medium
- A cup of black tint (this can be latex or acrylic)
- A paint brush
- A soft rag
- Sanding block
Total cost for this project is approximately $75 worth of paint and I spent around $100 for drawer knobs and pulls.
This is how my kitchen looked when I was finished.

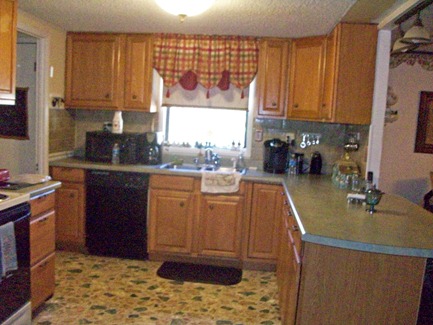
And here is how my kitchen looked before the remodel.
Let's get started.

Let's get started.

Tip: When you remove the doors and drawer fronts number them so you know where each one goes when re-hanging them.
So here is what I started with--your basic oak finish. I gave the top cabinets a lighter finish than the bottom ones.
I'll share how I finished the top cabinets with you first.
To start I painted them with Annie Sloan Chalk paint in Pure White.

Next I mixed black pigment with a glaze and brushed it on. (You may use a black acrylic or latex paint.)

Don't panic you are not ruining your paint job. 
I then took a dry rag and removed the glaze. (If you want a lighter color in the end before applying glaze give your cabinets a light coat of clear, soft wax and let dry.)

After I had removed most of the glaze, leaving more in the details, I decided It was not light enough for me and I wiped it again with a damp cloth to remove more glaze.

After they were dry and re-hung I still wanted the top cabinets lighter so I went back and dry brushed more Pure White on them. Finally, I was satisfied.
I then used ASCP clear wax applying it with a brush and wiping off excess with a rag as I went. After letting the wax dry for a few hours I distressed them and when they were totally dry to the touch I applied another coat of wax. To finish I buffed them to a light sheen.

Tip: It takes a total of at least 28 days for soft wax to fully cure until that time your furniture should be handled carefully to prevent scratching.
My bottom cabinets I wanted a little different so I started by painting them with ASCP Paris Gray. I then followed the steps above except when I applied the black glaze I sort of slopped it on every which a way so that when I followed up with dry brushing the white on I would have more texture.
Here are the pictures showing you the steps.


First one with glaze and the one at top after wiping with dry cloth.


The end of bar after glaze had dried.

By the way these are the front of the cabinet drawers they pop off which made them much easier to paint. This one is after about two coats of dry brushed Pure White.
Dry brushing is a method of using a dry brush with most of the paint wiped off. When you first start applying the paint you are barely touching the surface and as most of the paint is used you will press harder. You never want to get a solid
looking brush of paint on the wood.
After each coat dries you continue adding the white with a dry brush until you get the look you want. I think I applied a total of five coats in this manner.

Now here is where the bottom cabinets start to really look different. Next you wax them using the soft clear wax wiping off the excess with a dry cloth. I then took one of those gray sanding blocks and started distressing them. Resulting in the gray paint showing through in spots like they had worn over time.

You want to distress anywhere you think they would naturally wear. Around the handles and pulls, on the corners, at the base, etc. After all that scrubbing and rubbing they look like this


Corner top cabinet showing new bottom trim around cabinets.
To finish them I used different pulls on the top cabinets, the drawers, and the bottom cabinet doors to look as if they had been added at different times.

Oh yes, by the way, here is the inspiration picture I used to base my kitchen cabinet remodel on.

Now here is a picture of my finished kitchen.


Well, how did I do? You like? You can have the same look in your home. Its not that hard. If I can do it so can you.
I'd like to thank Remodelaholic for allowing me to share this tutorial with you. Thanks so much.
All the best with all of your future remodeling projects.
Hugs,