Hello blogger friends! Today I’m going to share how to install a farmhouse/apron sink into stock kitchen cabinets.
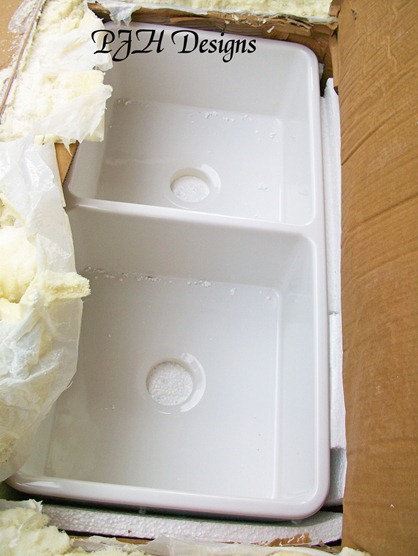
I was so excited when my sink arrived via FedEx freight. Here it is still in the box.
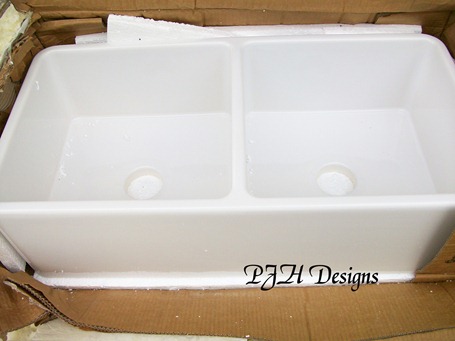
It is a Whitehaus fireclay, double bowl, farmhouse apron front sink. Isn’t she beautiful? If you are interested I bought her here.
This sink was one of the splurges of my renovation. I had three splurges, the sink, tin ceiling tiles, & my new refrigerator.
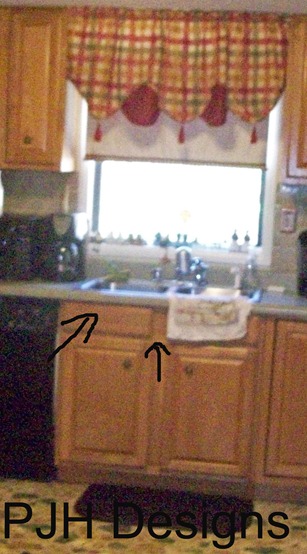
Now I have stock cabinets that were not made to hold up a 120 lb. sink. Yes, I said 120 lbs! Remember the before picture?
For the sink to fit we had to cut the front down and reinforce the cabinet. See the arrow at the left those are inserts that just pop out and the arrow at center is about the point we cut them down to, maybe a little lower.
Supplies needed:
Hammer
nails
12 to 14 feet of 2x4
wood filler
liquid nails or wood glue
miter saw
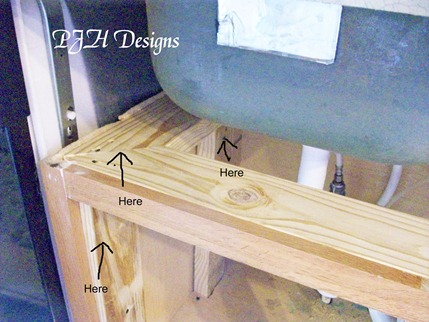
After you have cut out the cabinet front you need to measure the length needed for each 2x4 brace and then cut them out followed by measuring for the boards that will lay flat across the braces and cutting and nailing them in.
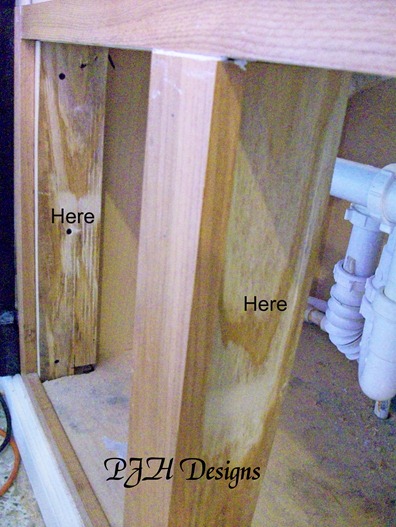
This picture shows where we inserted 2x4’s at the front corner and back corner on each side & the ones laying horizontally across the top. We used liquid nails on the ends of the boards before nailing them in to make the joints doubly strong.
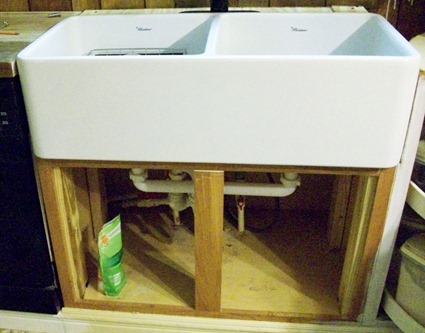
We also put one at the center front as you can see here. I hope to be able to break down the original doors, cut them down to size, and re-assemble them. If that does not work I will order replacement doors.
After the braces were in we found some help and set the sink in place.
I just LOVE it? lol I never thought I’d be in love with a sink.
The dimensions of the sink are: length (from front to back) 19 7/8”, width 32 3/4”, and the height is 10” which is the part I love most as they are so deep. I just hate a sink with no depth to it don’t you?
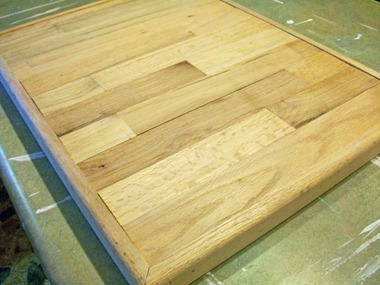
We are now working on my butcher block counter tops and they are fairly time consuming to construct. I will be posting a separate in depth explanation of how they are made, but for now I thought I’d leave you with a tease of one of the smaller pieces that go next to the stove. This one I plan to leave unfinished for food preparation the others will be stained and sealed with polyurethane.
I’ll have more instructional posts soon. Including, of course, making the butcher block counter tops, painting an appliance, installing snap-lock, tin ceiling tiles, upgrading basic cabinets to designer cabinets, and installing Allure flooring.
Have a great week and don’t forget if you haven’t already sign up with Linky Follower, Networked blogs, or via e-mail as Google Friend Connect has already gone away for some bloggers and may be going away for good.
I'm sharing with the following lovely parties:
Sunday
It's Party Time
Sunday Showcase Party
Sister Sunday Linky Party
Monday
Show Off Your Cottage Monday
Just Something I Whipped Up
Creative Blogger Party & Hop
Creative Me Monday
Show It Off Mondays
Mop It Up Mondays
Tuesday
Nifty Thrifty Tuesday
Trash 2 Treasure
Tuesday's Treasures
One Project at A Time
Take it On Tuesday
Wednesday
Wow Us Wednesday
Piece of Work Wednesday
Success U
Restored It Wednesday
Primp Your Stuff Wednesday
Thursday
Thriving on Thursdays
Transformation Thursdays
Sticker & Party Time @ 36th Ave
Friday
Feathered Nest Friday
Inspiration Friday
Furniture Feature Friday
Frugal Friday
Show & Tell Friday
Friday Link Up Party @ Redoux
