Friday, June 15, 2012

Changes

Hello blogger friends! Today I wanted to talk about Changes.  A little different for me as I usually stick to business and just share my furniture and home improvement projects.

I've already shared how I will be changing the way I share on my blog by refinishing several pieces of furniture and then blogging about them later as I rest between jobs.  

By the way here is a cute little side table I recently finished and carried to the shop.


Isn't it cute?! (Sorry couldn't help myself! lol)

It is hard for me to share my personal life as I feel most people are busy with their own and don't want to be bothered, and...it's personal!

Anyway, I have severe osteoarthritis and fibromylgia and problems with discs in my lower back. So I am trying to learn to pace myself. I just cannot possibly give up my passion in furniture and buying and selling antiques!

I am also starting on an anti-inflammatory diet as put forth by Dr. Weil.  Anyone else doing this kind of diet? I would love to hear how you are doing and what you like to eat, etc... I'm trying to take control of my health before it totally takes control of my life.

Okay. Enough complaining! I hope you'll stick with me as I go through this process. Thanks for listening (or is it reading) lol.

Here is a close-up of that little table.  


I know I'm hopeless. :-}

Here's the before:


Ha, Ha, Ha, Ha! I totally got that make over in this post about improving your health. lol

I would love to hear any advice you might have in this area of health or if you are going through the same process.

Until next time have a great weekend.

Update


Thanks friends for your well wishes & prayers I appreciate it so much.  


I'm sorry I didn't give more details on the little table.  The center was one of those faux marble pieces.  I just popped it out and using Mod Podge decoupaged a toile wrapping paper I picked up in Canton, TX at First Monday Trade Days to the top. (I love that paper and you'll be seeing more of it I'm sure) I let that totally dry and applied the rose image on top.  Then I sealed all of it with two more coats of Mod Podge.


The table I painted with a mixture of two-thirds "Old White" and one-third "Pure White" Annie Sloan chalk paint.  I then add some water to "Paris Gray," just enough to make it a little thinner so it would spread easily.  I washed this into all the details of the table to give them a little more depth and wiped off the excess.


After that I just sealed the table with two coats of clear, soft wax. It was so much fun to re-finish. I love cute little tables.


I'm joining the following parties:


Friday
Furniture Feature Friday

Tuesday
Nifty Thrifty Tuesday
Twiced On Tuesday

Wednesday
Wow Us Wednesday
POWW #93
Be Inspired

Thursday, June 14, 2012

French Typography Table


Hello blogger friends hope your day is starting out well.
I wanted to take a quick minute to share a coffee table redo that I finished recently.

I do not have a before picture. So sorry. I’m a terrible blogger because I forgot to take one, but it was a plain, light brown stain that was pretty much worn off everywhere but the legs.

Here’s the finished product.


I painted it with a mixture of Annie Sloan’s “Old White” and “Pure White” which gave me this gorgeous, buttery soft, white. I used two-thirds "Old White" and one-third "Pure White."

I used Photoshop to enlarge and print my graphic and traced it on using the chalk method. I’m sure you’ve seen it around blogland. You rub chalk on back of design and then trace it onto the table with a ball point pen.
I then filled in the design using Sharpie markers. Easy peasy.


Tip: Be sure to seal the finished image with a poly sealer that does not yellow as the Sharpie will smear.


I then applied two coats of a soft clear wax and buffed lightly.


I really like the embellishments I added to the sides. Don’t you?
Have a great weekend and Happy Father’s day to all the Fathers out there.


I'm joining the following parties:
Wednesday

Thursday

Friday

Sunday

Monday


Tuesday, June 12, 2012

Victrola Cabinet Redo

Hello blogger friends! I hope you are doing well.  I’ve been having trouble getting pictures off of my camera, but finally I found a solution and can start sharing the pieces I just finished last week and carried to the shop.

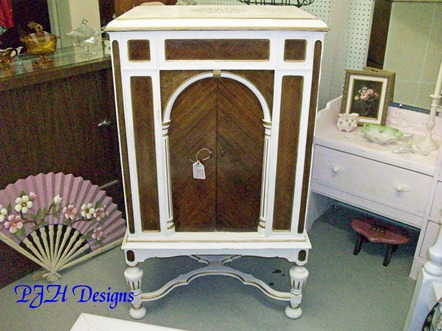
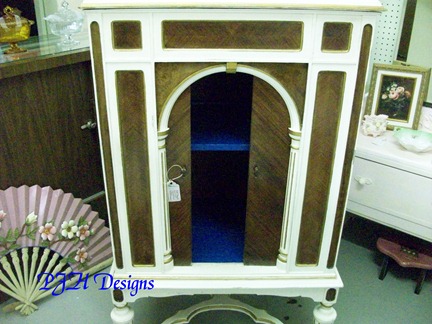
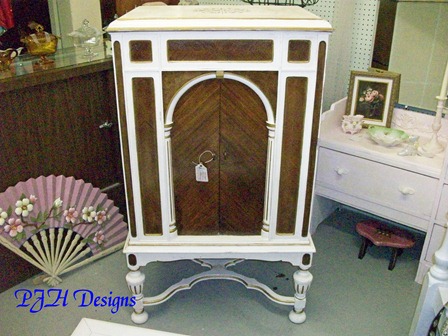
First, I like to share this Victrola cabinet redo. Here’s the after.

finishedshop

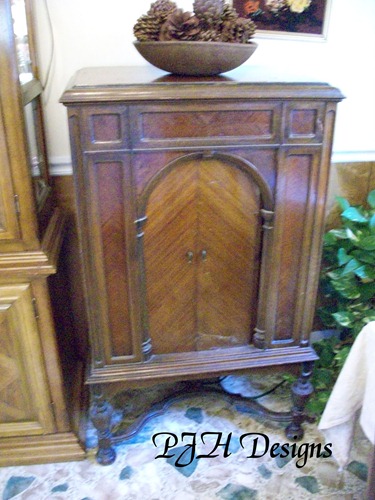
When I first saw this piece I knew I wanted to save the beautiful woodwork on the front.  The top and sides had some issues that would have required expensive veneer replacement.

Here is the before that I shared with you when I gave you a preview of my kitchen before renovation.


vintagepiecebefore


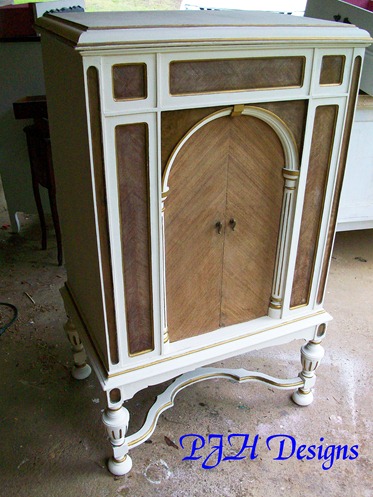
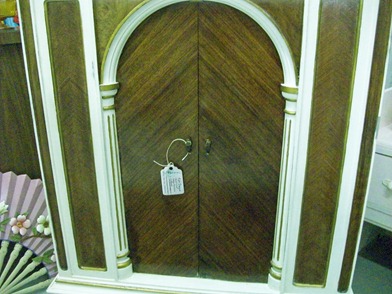
I totally stripped all the front panels on the Victrola.  Actually, I hand sanded them which took quite awhile. I then painted all the other areas in Annie Sloans “Old White” and the trim was painted with gold Rub & Buff.


inprocess


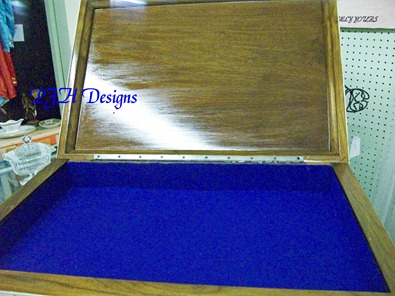
The top of the cabinet is where the actual Victrola was originally.  It had already been removed and a new bottom put in and then lined in felt.  I removed the old piece of felt and replaced it with new in a royal blue.

The inside top was sanded down and finished with a clear gloss polyurethane.


insidetop


I then painted the inside with a beautiful matching royal blue paint I already had  in stock.


insidebottom


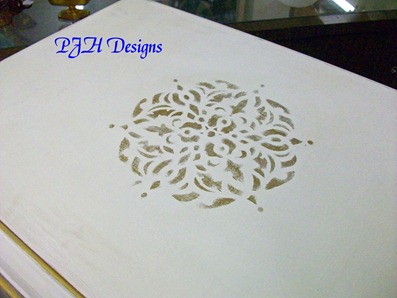
The outside top was painted with “Old White” and I then applied a pretty stencil I special ordered to the top with the gold Rub & Buff.


top


After that I waxed and distressed everything painted “Old White” using a clear soft wax.  When that had dried I applied another coat of wax and buffed lightly.

For that gorgeous veneer on front I applied three coats of clear gloss polyurethane. 

I love the juxtaposition of the old chalk paint finish and the high gloss finish of the veneer.


close


This piece would be great as a storage cabinet for a dining room or any room. You could store silverware or jewelry in the top. 


finishedshop


I’m so glad someone decided to save this old cabinet it would have been a shame to just throw it out!

Thanks for stopping by and have a good week. Princess

Tuesday, June 5, 2012

Vintage Edison Cabinet Redo

Hi y’all.  Wow, I’ve missed you!
Hope you have been okay and everything is going well for you.
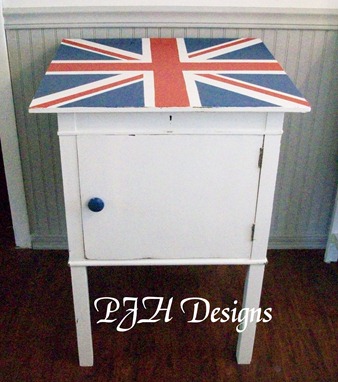
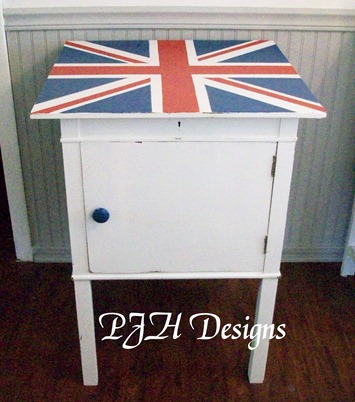
Today I have a before and after of an old Edison stereo cabinet. Here is the after.

finished

But before I share the details I wanted to share with you some changes I will be making on how I post on my blog. 

I’m not the most organized person in the world as my family will be quick to tell you. lol  I have been trying to blog, work on new pieces of furniture, look for new items at sales, share my graphics, and take care of my family all at the same time.  To say the least I was staying exhausted and frustrated.

I’ve finally gotten wise (it takes me awhile) and I will be finding and refinishing a few pieces at a time then sharing them on my blog as I rest in between. (I’m not getting any younger you know. Smile)  So if you do not see a post for a few days don’t give up on me but keep checking back because I will post several pieces in a row then take a break. Thanks for understanding.

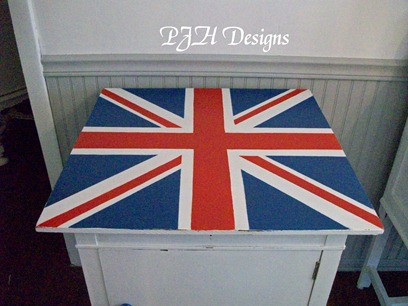
Now on to this Union Jack piece.  I had recently done a coffee table with a Union Jack so I was not thinking of doing another one really soon, but when I saw this piece it just cried out for one. 

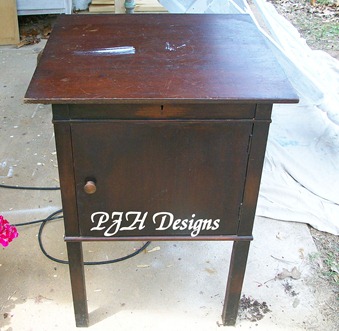
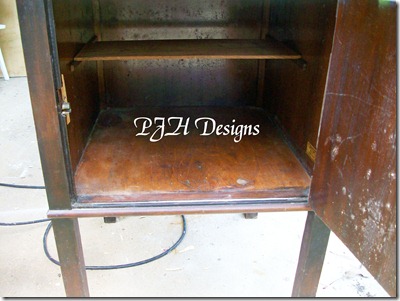
It started out like this.

before


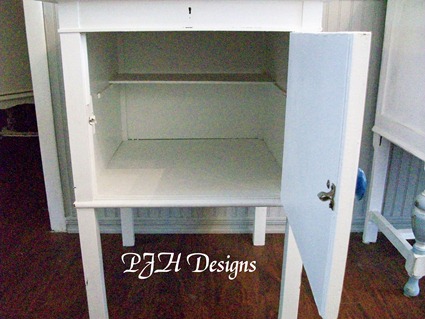
beforeinside

It had strong lines that I liked but was kind of blah and definitely grungy! Yuck! 

It also had the original label on the inside right and it had a number engraved on the inside  bottom front.

beforelabel


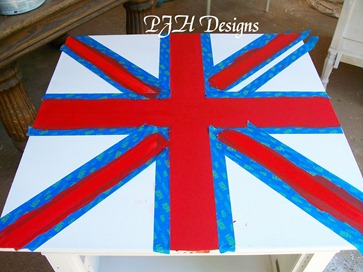
I started by giving it a good scrubbing and priming it. I left the label exposed.  I painted it with a basic interior/exterior white paint.  Then I measured and taped off the top to start painting the Union Jack. I painted  the red center first.


tapedoff


After that dried I measured and taped off the blue areas and painted them.  I used acrylic paint for the flag.  After it was fully dried, and because it was acrylic paint, I sealed it with two coats of satin water-based polyurethane.  The knob I painted blue to match. Finally I slightly distressed it in the obvious places.

And here again is the finished product.

finishedtop


finished


Much better don’t you think? It would be great for storage in any room and especially in a home with Coastal or British décor; but it would also look good in any home with a red, white, & blue theme.


afteropen


I’ll be sharing more pieces in the next day or two. Enjoy the rest of your week. Princess

Total Pageviews

LinkWithin

Related Posts Plugin for WordPress, Blogger...